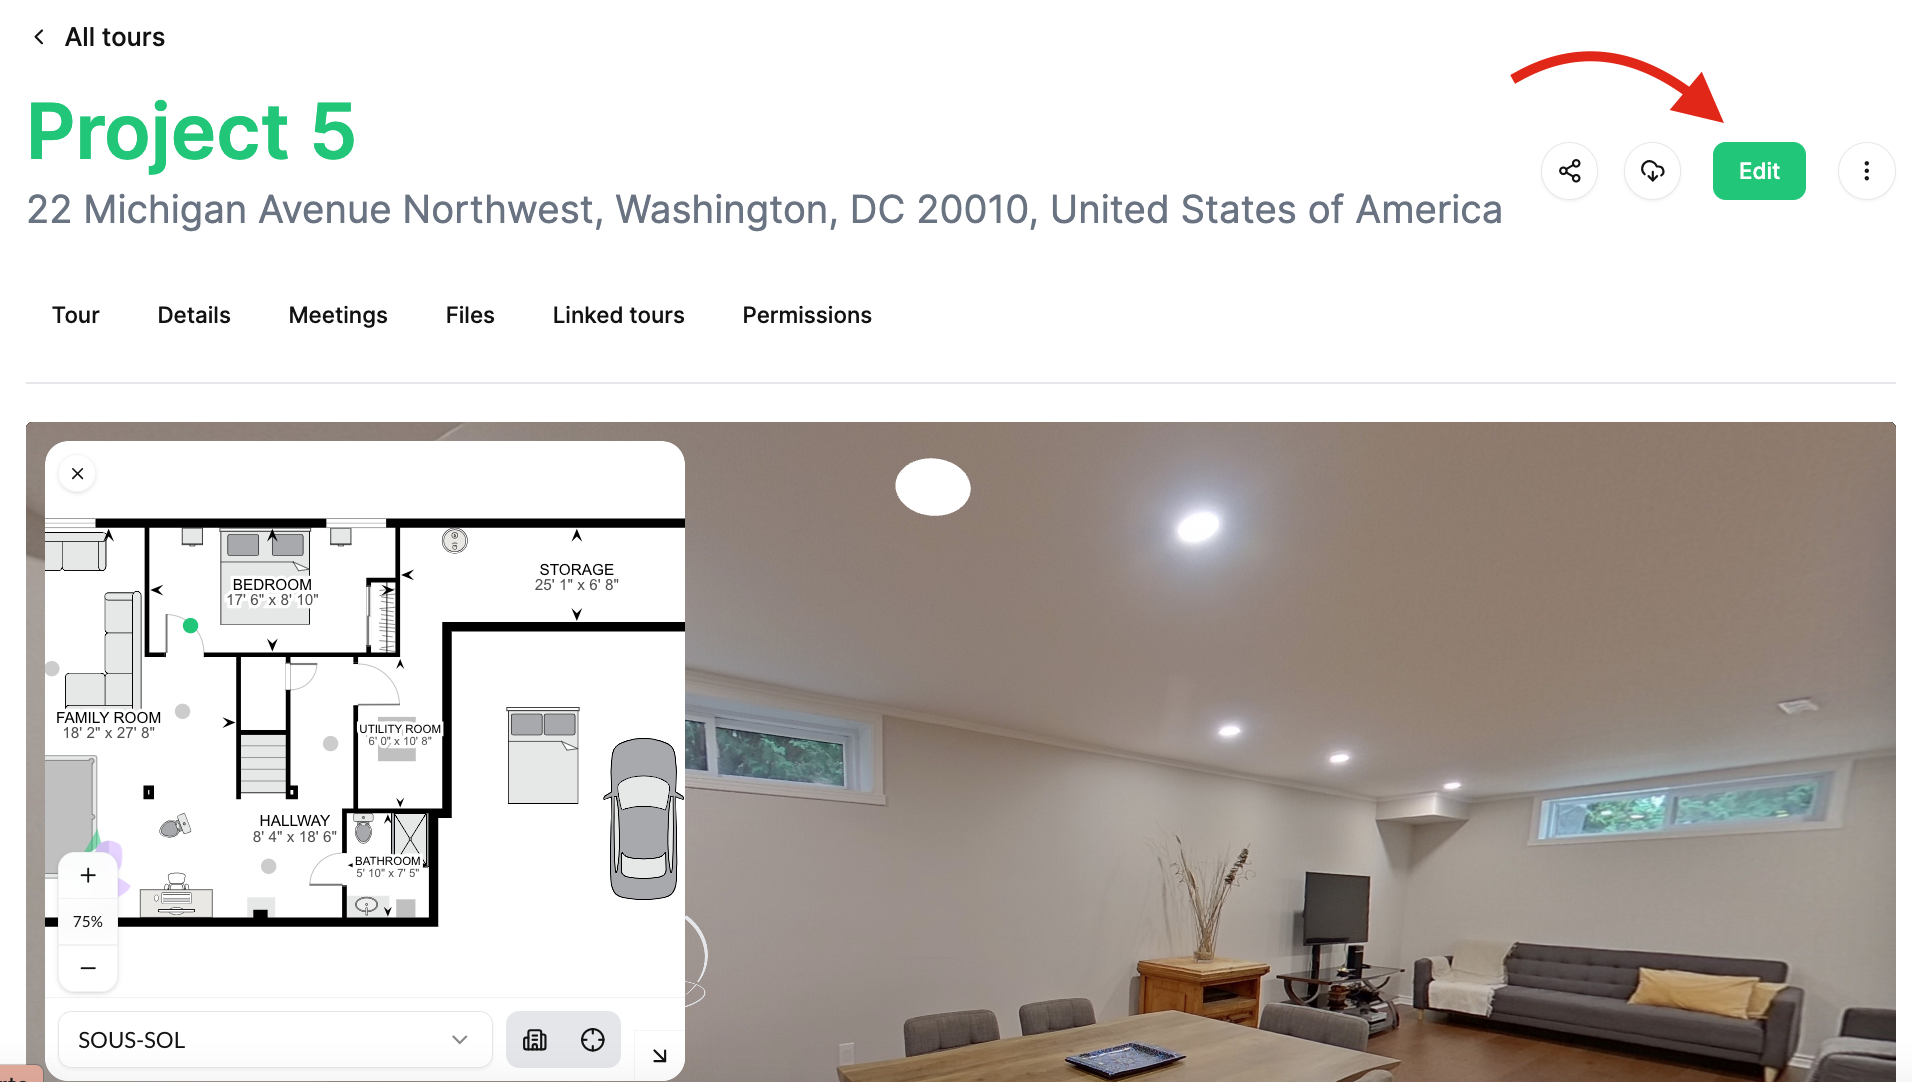
Post-Production (Player)
Open your project in theProject Management Software and access the player by clicking "EDIT".
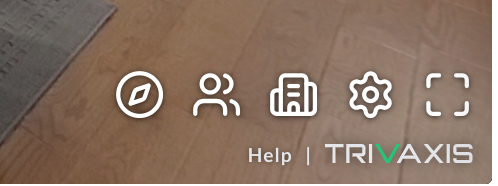
Player Menu
(Displayed from left to right)
- Toggled Views
- See other Visitors
- Dollhouse
- Settings
- Full Screen
WALLS AND OBJECTS
(Section names are shown in parentheses to indicate where each task can be performed.)
Save your work regularly.
- (Settings / Language) – Select the appropriate language.
- (Alignment / Floors) – Name all floor plans using UPPERCASE letters.
- (Alignment / Floors) – Arrange floors from the highest level to the lowest level.
- (Settings / Camera Settings) – Correct the camera height calibration. Measure from the floor to the camera lens on the first panorama and set it to 1 meter. Alternatively, measure from the floor to the kitchen countertop and calibrate to 36 inches.
- (Floor Plan / Objects) – Identify the reference wall (main entrance) to determine the floor plan orientation.
- (Floor Plan / Mini Map) – Align the other floors using the main floor plan stencil.
- Press "M"
- Hold CTRL to move the floor
- Press "M" again to confirm
- (Floor Plan / Objects) – Create skyboxes for exterior panoramas (not available in Dollhouse view).
- Select Menu Item
- Once the box is closed, the section will turn blue.
- (Floor Plan / Objects) – Create exterior boundaries for outdoor panoramas (only if outdoor area measurements are required).
- (Floor Plan / Objects) – Create 3D objects.
- IMPORTANT: When deleting one or more objects, ensure you use the correct menu.
- (Views / Views) – Create all required views for "Jump To" navigation.
- Position the panorama to the desired view
- Click "+"
- (Tags) – Create the required navigation jumps and clearly identify them.
- Click "+"
- (Settings / General Settings) – Define a Starting Position from the main entrance.
- Position the panorama to the desired view
- Click the paper airplane icon to select it.
- (Alignment) – Define an Initial Camera Position for each floor.
- Position the panorama to the desired view
- Click the camera icon to save the view.
- (Settings / Features) – Enable Environment Mapping for navigation.
- (Floor Plan / Objects) – Generate thick walls and calculate the total interior area.
- Click the front door or an exterior window on the mini-map.
- The wall will turn red.
- To remove an internal empty space:
- Hold Shift
- Click the empty area on the mini-map that should be excluded.
- (Floor Plan / Selected Face) – Identify all doors and windows.
- Select the area
- Choose the appropriate type
Top Menu
- Generate the Dollhouse view (optional)
- Generate the Floor Plan
FLOOR PLAN (Mini Map)
- (Floor Plan / Mini Map) – Furnish the floor plan (add 2D furniture and stairs).
- (Floor Plan / Mini Map) – Label all rooms.
FLOOR PLAN ONLY PROJECTS
For Floor Plan Only projects:
- No need to align all panoramas.
- No need to create Views, Jump To navigation, or UITags.
- No need to create 3D objects or Skyboxes.